Acrylic Paint For Wall Art
Acrylic paint is a versatile medium that has gained immense popularity among artists for its vibrant colors, quick drying time, and ease of use. When it comes to wall art, acrylic paint offers endless possibilities for creativity and expression. Whether you’re a seasoned artist or a beginner looking to add some flair to your living space, acrylic paint can be the perfect choice for your next project.
I. Choosing the Right Acrylic Paint for Wall Art
Before diving into your wall art project, it’s essential to select the right type of acrylic paint. Consider factors such as the desired finish, opacity, and budget. Acrylic paints come in various forms, including heavy body, soft body, and fluid acrylics, each offering unique properties suited for different techniques and styles.
II. Preparing Your Wall for Acrylic Painting
Proper preparation of the wall surface is crucial for achieving the best results with acrylic paint. Begin by cleaning the wall to remove any dirt or dust. Next, apply a primer suitable for acrylic painting to ensure proper adhesion and longevity of your artwork.
III. Tools and Materials Needed
To embark on your acrylic wall art journey, ensure you have the following essential tools and materials:
- Brushes: Invest in a variety of high-quality brushes suitable for acrylic painting. Different brush shapes and sizes will allow you to create various strokes and textures in your artwork.
- Palette Knives: Palette knives are indispensable for creating texture and applying paint in thick layers. They offer a different approach to painting compared to brushes and can add depth and dimension to your compositions.
- Paints and Mediums: Acrylic paints come in a wide range of colors and consistencies. Invest in a selection of quality acrylic paints in your preferred colors, including primary colors for mixing. Additionally, consider using mediums such as gel or modeling paste to alter the texture and viscosity of your paint, allowing for greater experimentation and artistic expression.
IV. Techniques for Acrylic Wall Art
When it comes to creating captivating acrylic wall art, mastering various techniques can elevate your artwork to new heights. Here are some essential techniques to explore:
- Brushwork: Brushwork is fundamental to acrylic painting and involves using different brushes to apply paint to the canvas. Experiment with various brush sizes and shapes to achieve different effects, from broad, sweeping strokes to fine details.
- Layering: Layering is a technique where multiple layers of paint are applied on top of each other to create depth and dimension in the artwork. Start with a base layer and gradually build up additional layers, allowing each one to dry before adding the next. This technique adds richness and complexity to your paintings.
- Blending: Blending involves seamlessly mixing colors together to create smooth transitions and gradients. Use a clean, damp brush or blending tool to gently blend adjacent colors while they are still wet, or apply a wet-on-wet technique to achieve soft, blended effects.
- Texture Creation: Texture creation adds tactile interest to your acrylic paintings and can range from subtle to bold. Experiment with different tools and techniques, such as palette knives, sponges, or even household items, to create interesting textures and patterns in your artwork. Whether you’re aiming for a smooth, glass-like finish or a heavily textured surface, texture creation adds visual and tactile depth to your acrylic wall art.
V. Creating a Design
Before starting your acrylic wall art project, take some time to plan out your design. Consider the size and shape of the wall, as well as the overall aesthetic you want to achieve. Sketching out your design beforehand can help you visualize the final result and make any necessary adjustments before painting.
VI. Step-by-Step Guide to Painting
Embarking on an acrylic wall art project requires careful planning and execution. Follow these step-by-step guidelines to bring your vision to life:
- Applying Base Layers: Start by applying base layers of acrylic paint to establish the foundation of your artwork. Use a large brush or palette knife to cover the canvas with the base colors, focusing on blocking in the main shapes and forms of your composition. Allow each layer to dry thoroughly before proceeding to the next step.
- Adding Details: Once the base layers are dry, it’s time to add details and refine your composition. Switch to smaller brushes or tools to add intricate details, highlights, and shadows to your artwork. Pay attention to light and shadow, texture, and perspective to create depth and realism in your painting.
- Final Touches: The final touches are where you can add finesse and polish to your acrylic wall art. Take a step back and evaluate your painting, making any necessary adjustments or additions to enhance the overall composition. Add highlights, accents, and finishing touches to bring your artwork to life and make it truly shine. Don’t be afraid to experiment and trust your instincts as you put the finishing touches on your masterpiece.
VII. Caring for Acrylic Wall Art
After completing your acrylic wall art, it’s essential to take proper care to ensure its longevity and vibrancy. Avoid exposing the artwork to direct sunlight or extreme temperatures, as this can cause fading or damage over time. Regular dusting and cleaning with a soft cloth can help maintain the beauty of your acrylic paintings.
VIII. Inspirational Ideas for Acrylic Wall Art
If you’re seeking inspiration for your next acrylic wall art project, the possibilities are endless. Consider exploring the following ideas to ignite your creativity:
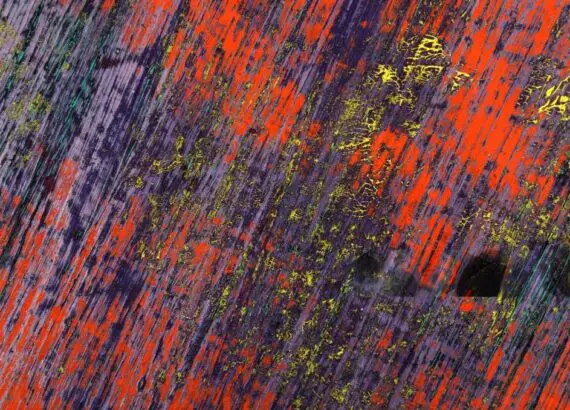
- Abstract Designs: Dive into the world of abstract art and let your imagination run wild. Experiment with bold colors, shapes, and textures to create dynamic and visually stimulating compositions. Abstract art allows for freedom of expression and invites viewers to interpret the artwork in their own unique way.
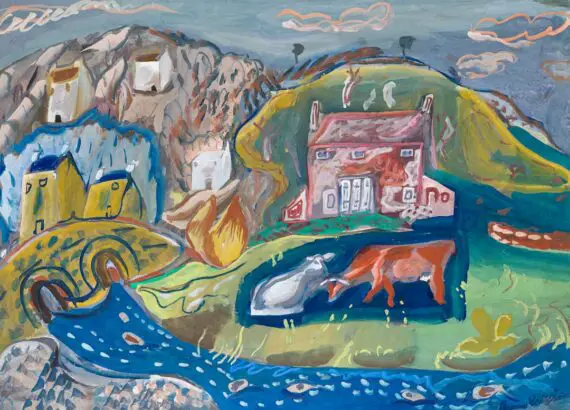
- Vibrant Landscapes: Capture the beauty of nature with vibrant landscape paintings. Whether you’re inspired by majestic mountains, serene seascapes, or lush forests, acrylic paint offers versatility in depicting various landscapes. Play with color palettes, light, and perspective to evoke emotion and atmosphere in your paintings.
- Expressive Portraits: Explore the human form and emotions through expressive portrait painting. Whether you’re depicting a loved one, a historical figure, or a fictional character, acrylic paint allows for bold and expressive brushwork. Focus on capturing the essence of your subject, conveying emotion through facial expressions, gestures, and colors.
Experiment with different styles, techniques, and subjects to create truly unique and captivating acrylic wall art that reflects your personality and vision. Let your creativity soar and embrace the joy of artistic expression as you embark on your next painting adventure.
IX. Benefits of Using Acrylic Paint for Wall Art
Acrylic paint offers several advantages that make it an excellent choice for wall art projects:
- Quick Drying Time: One of the most significant benefits of acrylic paint is its quick drying time. Unlike oil paints, which can take days or even weeks to dry, acrylics typically dry within minutes to hours, depending on the thickness of the paint layers. This fast drying time allows artists to work more efficiently, layering colors and adding details without long waiting periods between coats.
- Long-Lasting Vibrancy: Acrylic paint is known for its vibrant and intense colors, which retain their brilliance over time. Unlike watercolors, which can fade over time when exposed to light, acrylics are highly resistant to fading and retain their vibrancy for years to come. This long-lasting color retention ensures that your acrylic wall art will continue to dazzle and impress viewers for generations.
- Ease of Correction: Another advantage of acrylic paint is its ease of correction. Unlike other mediums such as oil or watercolor, acrylic paint can be easily corrected or modified even after it has dried. If you make a mistake or want to make changes to your artwork, simply paint over the area with the desired color or texture. This flexibility allows artists to experiment and explore new ideas without fear of ruining their work.
Overall, the quick drying time, long-lasting vibrancy, and ease of correction make acrylic paint an excellent choice for wall art projects. Whether you’re a beginner or an experienced artist, acrylics offer versatility and reliability, allowing you to unleash your creativity and create stunning works of art that will stand the test of time.
X. Challenges and Tips
While acrylic paint offers many benefits, it also comes with its own set of challenges. Here are some common challenges faced by acrylic artists and tips for overcoming them:
- Drying Time Management: One challenge when working with acrylic paint is managing the drying time. Acrylics dry quickly, which can be advantageous for layering and adding details, but it also means that artists must work efficiently to blend colors and create smooth transitions before the paint dries. To manage drying time effectively, work in small sections, and use a wet palette or misting spray to keep the paint moist while working. Additionally, consider using retarders or slow-drying mediums to extend the drying time and give you more time to work with the paint.
- Avoiding Overworking the Paint: Another challenge when painting with acrylics is avoiding overworking the paint. Acrylics have a tendency to dry quickly, which can make it tempting to keep blending and adding layers until the desired effect is achieved. However, overworking the paint can lead to muddy colors, loss of texture, and a less vibrant final result. To avoid overworking the paint, work quickly and decisively, and avoid excessive layering or blending. Trust your instincts and know when to stop and let the paint dry before making any further adjustments.
By managing drying time effectively and avoiding overworking the paint, you can overcome these challenges and create beautiful acrylic wall art with confidence and ease. Experiment with different techniques and find what works best for you, and don’t be afraid to embrace the unique properties of acrylic paint to unleash your creativity.
Conclusion
In conclusion, acrylic paint is a versatile and exciting medium for creating stunning wall art. Whether you’re a seasoned artist or a beginner, acrylics offer endless possibilities for creativity and expression. With proper preparation, technique, and care, you can create beautiful acrylic wall art that will enhance any space.
Frequently Asked Questions (FAQs)
- Can acrylic paint be used on all types of walls? Acrylic paint can typically be used on most types of walls, including plaster, drywall, and wood. However, it’s essential to ensure that the wall surface is properly prepared and primed for painting to achieve the best results.
- How long does acrylic paint take to dry on a wall? The drying time of acrylic paint on a wall can vary depending on factors such as humidity, temperature, and thickness of the paint layers. Generally, acrylic paint dries to the touch within 20-30 minutes and fully cures within 24 hours.
- Can acrylic paint be mixed with other mediums? Yes, acrylic paint can be mixed with various mediums such as gel, modeling paste, or pouring medium to alter its texture, viscosity, or drying time. Experimenting with different mediums can enhance the versatility of acrylic paint and open up new possibilities for artistic expression