How to Do Acrylic Nails Without Monomer?
How to Do Acrylic Nails Without Monomer? Monomer-free acrylic nails have grown in popularity in recent years as a result of their numerous advantages and growing concerns about sensitivities and health issues associated with traditional monomer-based acrylics. Individuals can enjoy beautiful and long-lasting nail extensions without the strong chemical odor and potential risks by opting for monomer-free alternatives.
The advantages of monomer-free acrylic nails are numerous. For starters, these alternatives provide a more pleasant application experience by eliminating the pungent odor typically associated with monomer-based products. This is especially useful for people who are sensitive to strong odors or have respiratory problems.
Furthermore, the increasing awareness and prioritization of overall well-being can be attributed to the growing popularity of monomer-free acrylic nails. People are becoming more aware of the health risks associated with certain beauty practices, and they are actively seeking alternatives that align with their desire for a healthier lifestyle.
With the availability of various monomer-free options in the market, nail enthusiasts can now achieve stunning results while ensuring a safer and more comfortable experience. Whether you have sensitivities or simply prefer a less intrusive approach to nail extensions, monomer-free acrylics provide an excellent alternative that allows you to express your style without compromising your well-being.
I. Tools and Supplies Needed
To successfully apply monomer-free acrylic nails, you will need the following tools and supplies:
1. Nail Tips:
These are artificial nail extensions that are pre-formed and come in a variety of shapes and sizes.
2. Nail Glue:
A strong adhesive designed specifically for attaching nail tips to natural nails.
3. Acrylic Powder:
A fine, colored powder that is used to apply the acrylic layer to the nail. Choose an acrylic powder that is monomer-free.
4. Acrylic Brush:
A specialized brush with firm bristles that is used to apply and sculpt acrylic powder onto the nails.
5. Buffer:
A nail tool used to smooth the surface of acrylic and remove any flaws.
6. Topcoat:
A clear protective layer applied over acrylic nails to improve shine and durability.
These tools and supplies are required for creating monomer-free acrylic nails that look professional. To ensure a smooth and successful nail extension experience, gather them before beginning the application process.
II. Preparing Your Nails
Before applying monomer-free acrylic nails, it’s important to properly prepare your natural nails. Follow these steps:
1. Cleanse your nails first: Use a nail polish remover to remove any existing nail polish. This will ensure that the acrylic application is applied to a clean surface.
2. Trim and shape your nails: Using a nail clipper or a nail file, trim and shape your nails to the length and style you prefer. Smoothly file the edges for a neat appearance.
3. Gently push back your cuticles: Soak your fingertips in warm water for a few minutes to soften your cuticles. Then, gently push back the cuticles with a cuticle pusher or a wooden orange stick to create a clean and even nail bed.
You can prepare your nails for the monomer-free acrylic application by cleaning them, shaping them, and pushing back your cuticles. This step ensures that the acrylic adheres well and that the end result is polished and professional.
III. Applying the Monomer-Free Acrylic
To apply monomer-free acrylic nails, follow these steps:
1. Apply a thin layer of nail glue to the back of a nail tip:
Begin by applying a small amount of nail glue to the back of a nail tip. Align the nail tip with the edge of your natural nail and gently press it down. To ensure proper adhesion, hold it in place for a few seconds.
2. Prepare the acrylic mixture:
Dip the acrylic brush into water to moisten it slightly. Then, dip the damp brush into the monomer-free acrylic powder. The moisture on the brush helps pick up the powder.
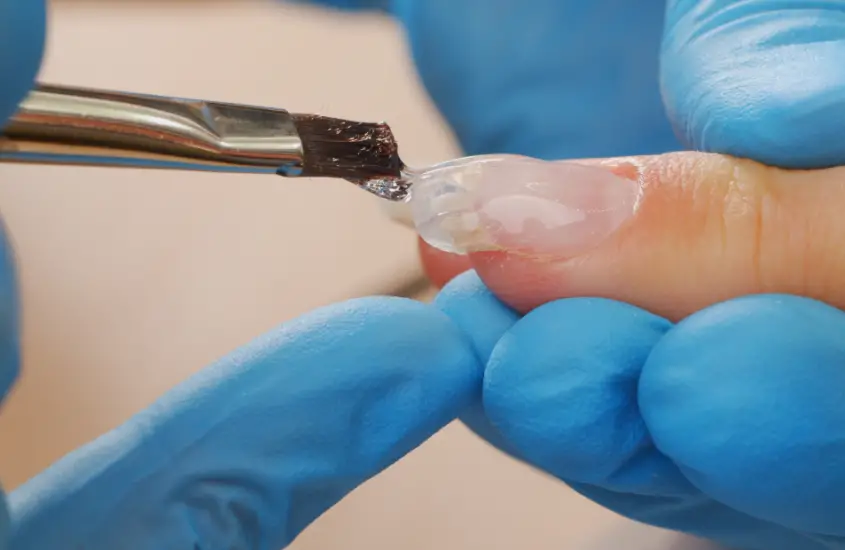
3. Apply the acrylic powder:
Using the acrylic powder-coated brush, gently tap off any excess. Pick up a small bead of acrylic powder with the damp brush. Place the bead on the nail surface near the cuticle. Spread and shape the acrylic with the brush, working from the cuticle to the tip of the nail. For a smooth finish, apply the acrylic evenly.
4. Build up the acrylic layer:
Repeat the process of dipping the brush into water, then into the acrylic powder, and picking up a small bead of powder. Apply it to the nail surface, slightly overlapping the previous layer. Continue adding acrylic powder and shaping it as needed to achieve the desired thickness and length. Work on one nail at a time to ensure precision.
Note: It is critical to work quickly but carefully during this step, as the acrylic mixture may begin to dry and harden.
You can successfully apply monomer-free acrylic nails by following these steps, building up the layers until you achieve the desired thickness and length. Keep a steady hand and take your time to achieve a professional-looking result.
IV. Shaping and Finishing
After applying the monomer-free acrylic, follow these steps to shape and finish your nails:
1. Allow the acrylic to dry completely:
Allow enough time for the acrylic nails to dry and harden. This usually takes 15-20 minutes, but drying times can vary. Be patient and wait until the acrylic is completely dry before moving on to the next step.
2. Shape the nails:
Once the acrylic has dried, use a nail file to shape the nails to the length and style you prefer. To avoid damaging the acrylic, file the edges of the nails gently in one direction. Form the nails symmetrically to achieve a balanced and uniform appearance.
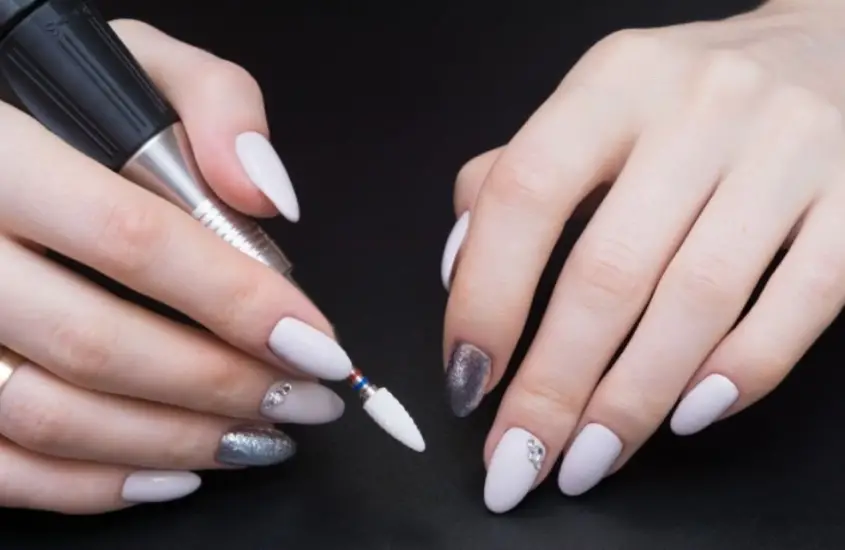
3. Buff the surface of the nails:
Using a buffer, go over the surface of each nail gently. This assists in smoothing out any imperfections and producing a polished finish. Be careful not to over-buff, as this can cause the acrylic layer to thin.
4. Apply a layer of topcoat:
To improve the shine and protect your acrylic nails, apply a layer of topcoat. Use a clear nail polish made specifically for this purpose. Apply the topcoat to each nail evenly, covering the entire surface. Allow it to completely dry.
By following these steps, you can shape and finish your monomer-free acrylic nails, achieving your desired length, style, and a smooth, glossy appearance. Take your time and pay attention to detail to ensure a professional-looking result that will make your nails stand out.
V. Maintenance and Removal
Maintaining and removing monomer-free acrylic nails requires proper care and attention. Here are some guidelines:
Maintenance:
1. Avoid excessive water exposure: Prolonged water exposure can weaken the adhesive that holds the acrylic nails in place. To ensure their longevity, avoid activities like prolonged soaking in water or excessive submersion.
2. Protect your nails while doing housework: Wear protective gloves when doing housework that involves harsh chemicals or prolonged contact with water. This will help to protect the acrylic nails and keep their appearance.
3. Moisturize your cuticles and nails: To keep your cuticles and nails hydrated, apply cuticle oil or a moisturizing nail treatment on a regular basis. This helps to keep the acrylic from drying out, cracking, and lifting.
Safe Removal:
1. Soak the nails in nail polish remover containing acetone: Soak a cotton ball or pad in an acetone-based nail polish remover to begin. Apply the soaked cotton to each nail, making sure it completely covers the acrylic. Wrap aluminum foil around each finger to secure the cotton.
2. Allow the nails to soak: Allow the nails to soak for 15-20 minutes. This allows the acetone to break down the acrylic, making removal easier.
3. Gently push off the softened acrylic: After the soaking period, remove the aluminum foil and cotton from each finger. Using a cuticle pusher or a wooden orange stick, gently push off the softened acrylic from the nail surface. Be careful not to force or scrape too hard, as this can damage your natural nails.
4. Cleanse and moisturize: After removing the acrylic, clean your nails with mild soap and water to remove any residue. To nourish and hydrate your nails, use cuticle oil or a moisturizing nail treatment.
If you’re unsure about removing the acrylic nails yourself, it’s advisable to seek professional assistance from a nail technician. They can safely and effectively remove the acrylic nails while minimizing any potential damage to your natural nails.
Conclusion
How to Do Acrylic Nails Without Monomer? Monomer-free acrylic nails provide a safe and attractive alternative for those seeking beautiful nail extensions without the drawbacks of traditional monomer-based products. This guide has outlined the step-by-step process, from nail preparation to application, shaping, and maintenance. By following these instructions and properly caring for your nails, you can achieve professional-looking results and enjoy the benefits of healthier and odor-free acrylic nails. With the increasing popularity of monomer-free options, you have the opportunity to express your style while prioritizing your well-being. Embrace this alternative method and get ready to showcase stunning nails that reflect your unique personality.