Acrylic Painting on Wood: Unlocking Creativity and Texture
Acrylic painting on wood is a fun and versatile artistic project that combines the richness of acrylic colors with the distinct texture of wood surfaces. Exploring this medium, whether you’re an experienced artist or a beginner, opens up a whole new world of possibilities. In this guide, we’ll go over the fundamentals of acrylic painting on wood, from choosing the right materials to advanced techniques that will elevate your creations.
I. Introduction to Acrylic Painting on Wood
Acrylic painting on wood combines the warmth of wood with the vibrant colors of acrylic paints. This one-of-a-kind combination enables artists to create works that are not only visually appealing but also tactile.
II. Materials Needed for Acrylic Painting on Wood
Before you begin your artistic journey, make sure you have all of the materials you’ll need to bring your vision to life. Collect the following necessities:
1. Acrylic Paints:
To unleash your creativity, invest in a high-quality set of acrylic paints in a variety of colors.
2. Brushes:
To achieve different textures and details in your artwork, use a variety of brushes, such as flat, round, and fine detail brushes.
3. Palette Knives:
These handy tools allow you to add depth to your acrylic paintings on wood by creating unique textures and effects.
4. Wooden Surface:
Select an appropriate wooden surface for your project. Consider factors such as grain pattern, thickness, and smoothness to improve the overall appearance.
Use appropriate sealants or varnishes designed for acrylic paintings on wood to protect your masterpiece. This ensures durability and protects against environmental factors.
With all of the necessary tools at your disposal, you’re now ready to dive into the world of acrylic painting on wood!
5. Sealants:
III. Choosing the Right Wood Surface
When it comes to acrylic painting on wood, the choice of your wooden canvas is critical to the outcome of your artwork. Take the time to investigate various types of wood surfaces and carefully select one that complements your artistic vision. Consider the following important factors:
1. Grain Pattern:
Look at the natural grain pattern of various wood options. Whether you prefer a pronounced grain for added texture or a smoother surface for intricate details, the grain pattern you choose has a big impact on the overall look.
2. Thickness:
The thickness of the wood surface is important. Thicker panels are more durable and can stand on their own, whereas thinner options may require additional support. Consider the weight and dimensions you want for your artwork.
3. Smoothness:
The smoothness of the wood surface affects how the acrylic paint adheres and blends. A smoother surface allows for more detailed brushwork and more precise color application.
You can choose a wood surface that not only complements your artistic style but also enhances the visual impact of your acrylic paintings by carefully considering these factors.
IV. Preparing the Wood Surface for Painting
Before you begin the creative process of acrylic painting on wood, you must properly prepare your wooden canvas. To ensure optimal paint adhesion and the longevity of your artwork, take the following steps:
1. Sanding:
Begin by sanding the wood surface to achieve a smooth and even texture. Remove any rough spots with fine-grit sandpaper to ensure a flawless foundation for your acrylic masterpiece.
2. Cleaning:
Thoroughly clean the wood after sanding to remove dust and debris. A clean surface is essential for uniform paint adhesion.
3. Priming:
Use a high-quality primer formulated for wood surfaces. Priming is an important preparatory step that creates a barrier between the wood and the paint. It improves adhesion, prevents uneven absorption, and extends the life of your artwork.
4. Drying Time:
Allow the primer to completely dry before proceeding to the painting stage. Patience is required during this stage to ensure that the surface is ready to receive the vibrant colors of your acrylic paints.
By taking the time to properly prepare your wood surface, you lay the groundwork for a smooth and long-lasting acrylic painting experience.
V. Basic Techniques for Acrylic Painting on Wood
Learn foundational techniques, including brushwork, palette knife usage, and the art of blending and layering, to add depth and dimension to your creations.
1. Brush Techniques
Experiment with different brush strokes to achieve varying textures and effects.
2. Palette Knife Techniques
Explore the use of palette knives for creating bold strokes and unique textures.
3. Blending and Layering
Master the art of blending colors seamlessly and layering to build depth.
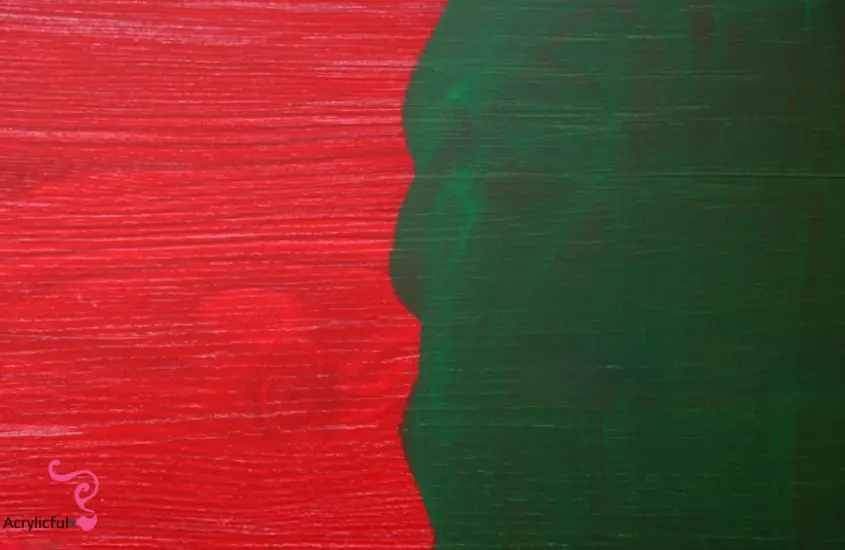
VI. Adding Texture to Your Wood Painting
Improve your acrylic paintings on wood by adding texture to give them a tactile dimension. In addition to appealing to the sense of touch, this gives your creations a visual layer of interest. To master the technique of adding texture to your wood paintings, follow these steps:
1. Textured Gels and Pastes:
Explore the world of textured pastes and gels made just for acrylic painting. By using these materials directly on the surface of the wood, raised patterns can be sculpted and produced.
2. Palette Knife Techniques:
Take advantage of palette knives’ versatility. Experiment with various strokes and pressures to create textured effects that will add depth and character to your artwork.
3. Natural Elements:
When creating your wood paintings, look to the natural world for inspiration. Consider using sand, tiny stones, or other materials to create a mixed-media masterpiece that will captivate the fingertips as well as the eyes.
4. Layering and Building:
Apply layers of varying thicknesses of acrylic paint. Play with the texture as you build layers, leaving some areas smoother and enhancing others for a dynamic visual and tactile contrast.
5. Experimentation:
Do not be afraid to use unconventional tools. From sponges to fabric, the world around you provides a plethora of texture-inducing options for your wood paintings.
VII. Tips for Achieving Vibrant Colors
Capturing the essence of vibrant colors is essential in creating visually appealing acrylic paintings on wood. Here are some helpful hints for making your colors pop and infusing energy into your artistic expressions:
1. Quality Pigments:
Begin with high-quality acrylic pigments. Investing in artist-grade paints ensures rich, vibrant colors that will last. Look for pigments with a high level of color saturation.
2. Color Wheel Exploration:
Get acquainted with the color wheel. Understanding complementary and contrasting colors allows you to create vibrant color schemes.
3. Layering Techniques:
Try applying layers of acrylic paint. Layering your colors gives them richness and depth. For the best results, let each layer completely dry before adding the next.
4. Mixing Mediums:
Experiment with acrylic mediums to boost color vibrancy. Gloss mediums give your colors a luminous quality, whereas gel mediums can be used to extend paint and maintain color intensity.
5. White Base Layer:
First, create a white base layer. A light coat of white paint applied prior to your chosen colors can enhance their vibrancy, especially on a wooden surface.
6. Contrast and Highlights:
Use contrast to make colors stand out. Use darker shades alongside lighter ones, and strategically place highlights to add visual interest and dimension.
7. Maintain Consistent Brushwork:
Maintain consistent brushwork to ensure even color distribution. This eliminates streaks and uneven patches, allowing your colors to shine evenly.
8. Mastering a Limited Color Palette:
Occasionally, experimenting with a limited palette of colors yields the most vibrant results. Focus on a few main hues and experiment with different combinations of them.
9. Brush Strokes:
Experiment with various brush strokes to add dynamism to your colors. To add texture and depth, try broad strokes, stippling, or cross-hatching.
10. Protective Sealants:
After you’ve finished your painting, apply a sealant or varnish to keep the vibrancy of your colors. This also gives your artwork a professional look.
By incorporating these tips into your acrylic painting process, you’ll be able to explore the full range of color possibilities, ensuring that your wood paintings are vibrant and captivating.
VIII. Sealants and Varnishes for Longevity
It is critical to preserve the longevity of your acrylic painting on wood in order to ensure its enduring beauty. Using the proper sealants and varnishes adds a protective layer, protecting your masterpiece from environmental factors. Here’s how to seal and varnish your artwork properly:
1. Choosing the Best Sealant:
Look for UV-protective items that work with acrylic paints as well. You can choose from matte, satin, or gloss finishes to alter how your piece will look in the end.
2. Timing is Everything:
Wait until your acrylic painting is completely dry before sealing it. Ensure that each layer of paint is cured to avoid moisture trapping, which can cause cloudiness or bubbling.
3. Even Application:
Apply the sealant evenly across the entire surface of your painting with a clean, soft brush. Maintain a consistent finish by paying attention to brushstrokes. For maximum protection, apply multiple thin layers.
4. Edge Protection:
Remember to seal the edges of your wood canvas. This keeps moisture out of the wood, lowering the risk of warping over time.
5. Varnish for Extra Shine:
If you want a glossy finish and more vibrancy, apply a clear acrylic varnish after the sealant. This step improves color saturation and adds a layer of protection.
6. Drying Time:
Allow the sealant and varnish to dry thoroughly between coats. Follow the manufacturer’s instructions regarding drying times to ensure the effectiveness of the protective layers.
7. Considerations for Storage:
If your acrylic painting will be stored for an extended period of time, keep it in a dry, cool environment. Avoid being exposed to high temperatures or humidity.
8. Regular Inspection:
Periodically inspect your sealed and varnished artwork for any signs of damage or wear. If necessary, reapply sealant or varnish to maintain optimal protection.
IX. Common Mistakes to Avoid
Avoid potential pitfalls such as overworking the paint, using too much water, and failing to allow layers to dry properly.
1. Paint Overworking
To avoid muddiness and maintain the clarity of your artwork, know when to stop.
2. Using Excessive Water
Understand the delicate balance of water usage to avoid color dilution.
3. Not Allowing Layers Dry
It’s important to take your time and allow each layer to dry completely before adding the next.
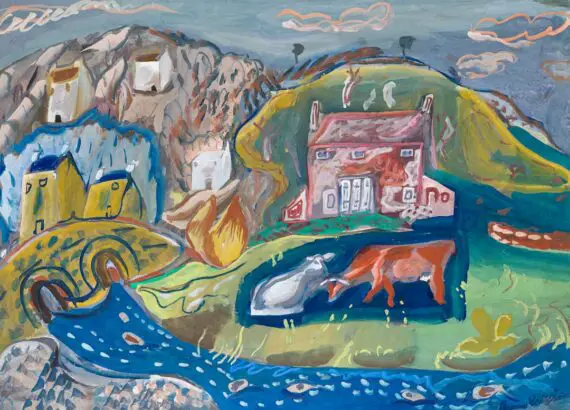
X. Inspiration for Acrylic Paintings on Wood
Find inspiration in nature-themed paintings, delve into abstract wood art, or create personalized wooden signs that reflect your style.
1. Nature-themed Paintings
Capture the beauty of landscapes or flora on your wooden canvas.
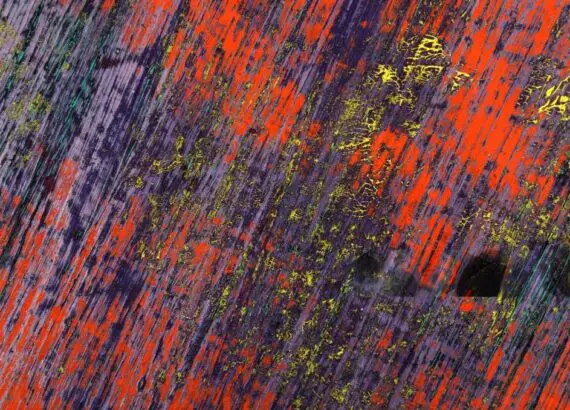
2. Abstract Wood Art
Let your imagination run wild with abstract concepts and forms.
3. Customized Wooden Signs
Personalize spaces with hand-painted wooden signs that convey unique messages.
XI. Step-by-Step Guide for a Simple Wood Painting Project
Embarking on a wood painting project can be a rewarding and enjoyable experience, especially for beginners. Follow this detailed step-by-step guide to create your own acrylic masterpiece on wood, from conceptualization to completion:
Step 1: Gather Your Materials
Collect all the necessary materials:
- Acrylic paints in your chosen colors
- Various brushes for different techniques
- A wooden surface of your preferred size
- Palette for mixing colors
- Water and a rag for cleaning brushes
- Apron or old clothes to protect yourself
Step 2: Select Your Design
Choose a straightforward design or image for your wood painting. Consider a nature-inspired theme, abstract shapes, or even a pattern as a starting point.
Step 3: Prepare the Wood Surface
Sand the wooden surface to make it smooth. You can leave some natural texture if you prefer a rustic look. Wipe away any dust before applying a thin coat of primer and allowing it to dry completely.
Step 4: Create a Design Sketch
Lightly sketch your chosen design on the primed wood surface with a pencil. This will serve as a guideline for your painting.
Step 5: Create a Background
Begin by painting a background. Choose a base color that goes well with your design. Allow it to completely dry before proceeding to the next step.
Step 6: Detailing and Layering
Begin by layering your design. For varying textures and details, use different brushes. Don’t be afraid to play around with different colors and strokes.
Step 7: Allow It to Dry
Allow each layer of paint to completely dry before applying the next. This preserves the colors’ vibrancy and distinction.
Step 8: Perfect Your Design
Spend some time perfecting the details. Any other components that enhance the composition as a whole, such as highlights and shadows, should be included.
Step 9: Finish the Painting
Apply a sealant to the painted surface once it has dried completely to preserve the paint and increase its lifespan. Follow the sealant’s instructions for the best results.
Step 10: Show or Give Your Artwork
Congratulations! Your easy wood painting project is finished. Choose whether you want to hang it in your home, give it as a thoughtful gift, or frame it for a more polished look.
XII. Showcasing Your Acrylic Wood Paintings
After you’ve poured your creativity into your acrylic wood paintings, it’s time to highlight their beauty and uniqueness. Investigate these various methods for displaying and exhibiting your artworks, transforming them into focal points of admiration:
1. Elegance in Framing:
Choose sophisticated frames that match the aesthetic of your acrylic on wood paintings.Choose frames that enhance the overall design, such as a traditional wooden frame, a modern metal frame, or a rustic, reclaimed wood frame. Your artwork will look more sophisticated and will be shielded from dust and damage with the right framing.
2. Gallery Wall Ensemble:
Make a gallery wall by grouping together several acrylic wood paintings. Experiment with different sizes, shapes, and themes to create a visually appealing and cohesive display. With this arrangement, your wall becomes an art gallery, and viewers can experience a larger story through all of your pieces.
3. Functional Art:
Turn your acrylic wood paintings into useful items. Make a one-of-a-kind serving tray out of a painted wooden panel, or fashion a hand-painted tabletop. Integrating your artwork into everyday items gives your living spaces a personalized touch and allows your creativity to permeate daily life.
4. Floating Shelves:
Use floating shelves to display your acrylic wood paintings alone or in a curated arrangement. Floating shelves are a modern and minimalist display option that allows your artworks to take center stage without the distraction of heavy frames or clutter.
5. Rotating Art Easels:
Invest in rotating are easels to dynamically display your paintings. These easels allow you to display your artwork from various angles, giving viewers a complete view of your masterpiece. This method is especially useful for pieces with intricate details on all sides.
6. Art Installations:
By strategically placing your acrylic wood paintings, you can transform a room or a dedicated space into an immersive art installation. Experiment with lighting to highlight textures and colors, creating an enticing atmosphere that draws viewers into your artistic world.
7. Digital Displays:
Use technology to your advantage by digitizing your artwork and displaying it on digital screens. This modern approach enables you to create dynamic presentations that can be easily updated, giving your audience a new viewing experience.
XIII. Exploring Advanced Techniques
Push the boundaries of your creativity with advanced techniques like resin coating and the incorporation of mixed media.
1. Resin Coating
Achieve a glossy finish and added protection with resin coatings.
2. Incorporating Mixed Media
Combine acrylics with other materials for multidimensional artworks.
XIV. Troubleshooting: Dealing with Challenges
1. Cracking and Peeling
Understand the causes and solutions for issues like cracking and peeling.
2. Uneven Drying
Explore techniques to achieve uniform drying across your wooden canvas.
3. Adhesion Issues
Troubleshoot problems related to paint adhesion on wood surfaces.
Conclusion
Beginning an acrylic painting on wood journey opens up a world of creative expression. This artistic venture offers limitless possibilities, from mastering basic techniques to exploring advanced concepts. Allow the warmth of wood to intertwine with the vibrancy of acrylics in your creations, unlocking a world of texture and visual delight.