How To Paint On Glass Permanently?
Introduction
Glass painting is an enthralling art form that transforms plain glass surfaces into stunning works of art. Learning how to paint on glass, whether you’re a seasoned artist or a beginner, permanently opens up a world of creative possibilities. This guide will walk you through the step-by-step process, materials, and techniques for creating beautiful, long-lasting masterpieces.
Materials Needed
Types of Paints
Before you begin your glass painting endeavor, you should become acquainted with the paints that work best on glass surfaces. Acrylic enamel paints are a popular choice among the many alternatives available.
1. Acrylic Enamel Paints:
Acrylic enamel paints are well-known for their durability and rich color palette. They adhere nicely to glass surfaces and produce a long-lasting, peel- and fading-resistant finish. These paints are easy to use and clean because they are water-based.
2. Choosing the Right Paint:
Make sure the paints you choose are specifically labeled as glass-safe. This distinction is critical for achieving optimal adhesion and ensuring your artwork lasts.
3. Vibrancy and Versatility:
One of the primary benefits of acrylic enamel paints is their ability to produce vibrant, eye-catching colors. Because of this adaptability, you may create detailed designs ranging from delicate details to powerful strokes, allowing your glass painting to be genuinely creative.
4. Mixing and blending:
Trying new things is encouraged! Acrylic enamel paints can be easily mixed and blended to create custom shades, allowing you to experiment with a wide range of colors. This adaptability comes in handy when working on a variety of glass projects.
5. Drying Time:
Despite the fact that acrylic enamel paints dry quickly, it is crucial to adhere to the manufacturer’s instructions. To ensure an impeccable and even finish, wait until each layer is totally dried before adding the next.
Choosing the Right Glass
Transparent vs. Translucent
When it comes to glass painting, the type of glass you use has a significant impact on the overall impact of your artwork. Understanding the difference between translucent and transparent glass is essential for achieving the desired visual effect.
1. Transparent Glass:
As the name implies, transparent glass allows light to pass through easily. This feature produces a stunning luminous effect, increasing the vibrancy of your painted design. Transparent glass can lend your artwork an ethereal appearance through the interaction of light, making it particularly ideal for projects that need for a vibrant and radiant finish.
2. Translucent Glass:
Translucent glass, on the other hand, has a frosted or diffused appearance. This glass softens the light that passes through it, creating a more subtle and muted effect. Translucent glass is ideal for creating a more delicate or understated aesthetic in your glass painting. For designs that benefit from a diffused glow, it is very helpful.
3. Think about your design and desired outcome:
The choice between transparent and translucent glass should be guided by the specific design and visual impact desired. Transparent glass may be the best canvas for your artwork if it relies on the interaction of light and color. On the other hand, translucent glass provides a unique surface to bring your vision to life if you prefer a more subdued or textured look.
4. Practical Considerations:
Beyond the creative component, take into account practical elements like where to display your glass artwork. Moreover, for applications where optimal light transmission is crucial, transparent glass could be recommended, but translucent glass can provide some level of seclusion or diffusion.
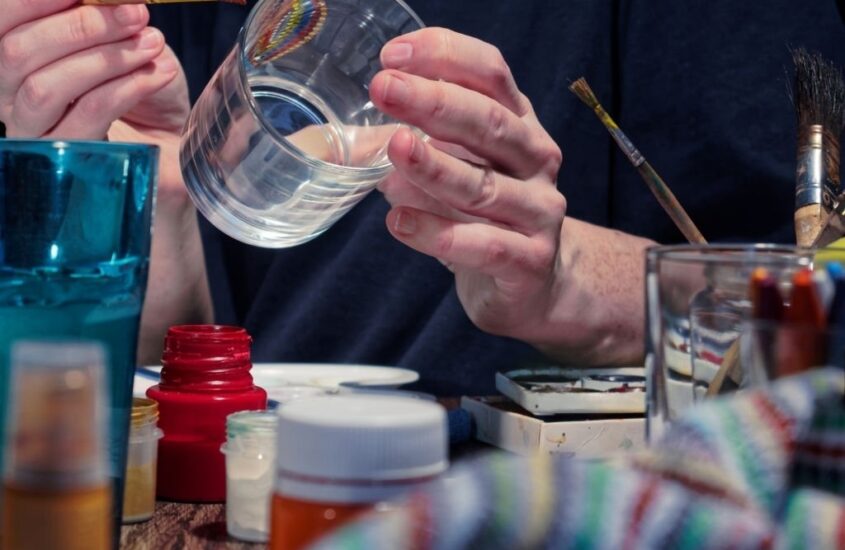
Surface Preparation
Proper surface preparation is essential for ensuring your artwork’s seamless adhesion and longevity. Follow these simple steps to make a canvas that not only accepts paint but also ensures a long-lasting finish.
1. Thorough Cleaning:
Begin by meticulously cleaning the glass. Clean up any dust, fingerprints, or debris that has accumulated on the surface. A clean canvas allows the paint to adhere evenly, preventing any imperfections in the finished product.
2. Use the Proper Cleaning Agents:
Use a mild glass cleaner or a vinegar-water mixture. Avoid using harsh chemicals that may leave residues or interfere with paint adhesion. This cleaning task is best accomplished with a lint-free cloth.
3. Priming for Success:
Once your glass has been thoroughly cleaned, the next step is to apply a suitable primer. The primer acts as a foundation, providing a smooth and adherent surface for the paint to adhere to. Hence, choose a primer that is specifically designed for use on glass surfaces.
4. Application Method:
Using a brush or a sponge applicator, apply the primer evenly. Make sure to cover the entire surface, leaving no spots untreated. The goal is to make a consistent base that strengthens the bond between the glass and the paint.
5. Drying Time:
A allow the primer to dry completely because the drying time will vary depending on the primer you use, so follow the manufacturer’s instructions. Patience pays off at this stage in the form of a well-prepared surface ready to display your artistic expression.
6. Inspect for Flaws:
Before beginning the painting phase, inspect the primed surface for any flaws. Consider applying an additional coat of primer if you notice any uneven areas or missed spots for a flawless foundation.
Sketching Your Design
Tips for Effective Sketching
A well-thought-out and well-executed sketch is the foundation of any successful glass painting project. Follow these guidelines to ensure that your sketch serves as the foundation for your artistic vision.
1. Plan Your Design:
Take some time to figure out your design before you start drawing on the glass. Consider the composition, balance, and focal points. A well-thought-out approach increases the overall coherence of your artwork, whether it’s a complex pattern, a landscape, or an abstract concept.
2. Choose the Right Marker:
For your sketching, use a water-soluble marker. This option enables simple corrections and adjustments as you work through your design. As, the marker is water-soluble, any marks that you are dissatisfied with can be easily wiped away.
3. Consider Glass Shape and Size:
The shape and size of the glass canvas should be complemented by your design. Take into account any curves or distinguishing characteristics of the glass surface. This careful consideration ensures that your artwork complements the natural characteristics of the canvas.
3. Begin with Light Strokes:
Begin with light, delicate strokes. This method allows you to make changes and refine your design as you go. Starting light also reduces the severity of any potential errors, making them easier to correct.
4. Build Layers and Details:
Add layers and details to your sketch gradually. This step-by-step procedure allows you to fine-tune the overall composition while also ensuring that each element of your design complements the next. Take note of proportions and perspectives.
5. Use Reference Images:
If you want to create a realistic representation, don’t be afraid to use reference images. They can assist you in accurately capturing details ranging from light play to intricate patterns. Reference images can help you create a polished and professional-looking glass painting.
6. Fix Errors:
A necessary component of the creative process is making mistakes. As soon as you spot an error in your sketch, correct it by wiping away the undesired lines using a damp cloth or sponge. Your final design will be exactly what you intended thanks to this iterative approach.
Types of Glass Painting Techniques
Stained Glass, Reverse Glass, and More
How to paint on glass permanently? Unlock the full spectrum of artistic possibilities by exploring different glass painting techniques. Each technique offers a unique way to play with color, texture, and light, allowing you to achieve various captivating effects.
1. Stained Glass Technique:
Stained glass painting is a timeless technique that mimics the vibrant, intricate patterns found in traditional stained glass windows. When light travels through, this technique involves outlining and filling in portions with vibrant colors to provide a brilliant and dynamic look.
2. Reverse Glass Painting:
Reverse glass painting is a captivating technique that adds depth and complexity to your artwork. Instead of painting in the typical order, you start with the background and work your way up. This unique approach results in a distinctive finish with a sense of depth and mystery.
3. Glass Etching:
Glass etching is a technique that involves using abrasive or chemical substances to create subtle, frosted designs on the glass surface. So while working with complex patterns or delicate details, this technique is extremely effective at producing subtle, understated effects.
4. Crackle Glass Technique:
Crackle glass painting creates a vintage, aged appearance on your glass surface. This technique involves applying a crackle medium over the paint, which, as it dries, results in fine cracks and textures. The outcome is a beautifully weathered look that adds character to your glass art.
5. Frit Painting:
Frit painting involves using crushed or ground glass particles, known as frits, to create textured and mosaic-like designs. This technique allows for a rich interplay of colors and textures, giving your glass artwork a three-dimensional quality.
6. Enamel Glass Painting:
Enamel glass painting utilizes enamel paints that can be applied with precision and detail. This technique is ideal for intricate designs and fine lines, allowing artists to create highly detailed and refined glass paintings.
7. Dichroic Glass Painting:
Dichroic glass painting involves using glass with a special coating that reflects different colors at various angles. This technique results in shimmering, iridescent effects, adding a touch of magic and allure to your glass artwork.
8. Bubble Glass Painting:
Create a whimsical and playful appearance by incorporating bubble glass painting. Using this approach, you may give your artwork a fun and unpredictable touch by adding bubbles or other imperfections to the glass surface while you’re painting. element to your artwork.
Selecting Appropriate Brushes
Choosing the right brushes is an important step in achieving precision and the desired artistic effects in your glass painting project. Here’s how to choose the right brush size and type for your masterpiece:
1. Small Brushes for Intricate Details:
Use small brushes to work on intricate details or fine lines in your glass painting. These brushes provide fine control, allowing you to add delicate features and intricate patterns with ease. A steady hand and a small brush ensure that every detail of your design is visible.
2. Larger Brushes for Broader Strokes:
Use larger brushes for broader strokes and covering larger areas of your glass canvas. These brushes are great for adding bold, expressive elements to your work. They enable you to apply paint more liberally, resulting in a dynamic and impactful visual effect.
3. Acrylic Paint Brushes:
When working with acrylic paints, synthetic brushes are the best option. These brushes are made of synthetic materials, making them long-lasting and resistant to the abrasive nature of acrylic paints. Furthermore, synthetic brushes retain their shape well over time, ensuring consistent performance.
4. Flat Brushes for Even Coverage:
Flat brushes are excellent for achieving even coverage on your glass surface. They provide a smooth and consistent application of paint, whether you’re applying base coats or making sweeping strokes. They are versatile tools for a variety of painting techniques.
5. Round Brushes for Detail and Precision:
Round brushes are versatile and well-suited for both detailed work and broader strokes. The fine tip of a round brush allows for intricate detailing, while the broader belly is ideal for covering larger areas. Round brushes are an excellent addition to any brush collection because of their versatility.
6. Angled Brushes for Dynamic Angled Strokes:
Angled brushes are made to create dynamic angled strokes. These brushes are ideal for adding shading, drawing sharp lines, and achieving angular details in your glass painting. The angled shape allows you to be more creative with your brushwork.
7. Fan Brushes for Textured Effects:
Consider using fan brushes to add texture to your glass painting. These brushes have bristles that are spread out like a fan, allowing you to create interesting textural effects. Fan brushes are great for adding texture to your artwork by creating foliage, clouds, and other textured elements.
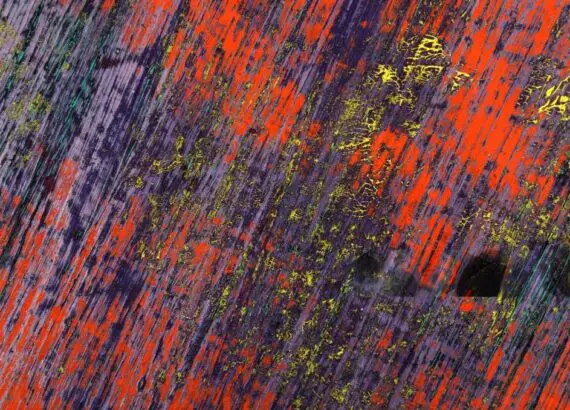
Layering and Detailing
A Methodical Approach to Making Lasting Impression:
A key aspect of achieving depth and richness in your glass painting is layering your paint in a systematic manner. To ensure that each layer contributes to the overall beauty of your masterpiece, follow these steps:
1. Begin with some background information:
Begin by laying down the foundation—your artwork’s background. This sets the tone for the entire piece, providing a backdrop for your detailed elements to shine against. Colors should complement your overall design and mood.
2. Add Details Gradually:
Once your background is complete, gradually add details. Begin with broad strokes and basic shapes and work your way up to finer details. This method allows you to gradually add complexity, ensuring that each layer adds to the visual interest of your glass painting.
3. Think about layer transparency:
Glass painting provides a one-of-a-kind opportunity to experiment with transparency. Take into account how each layer interacts with the layers beneath it. Transparent and translucent paints can produce stunning effects by allowing light to pass through the layers and adding depth to your artwork.
4. Allow Plenty of Time:
Glass painting is the domain of the patient artist. Allow each layer to dry completely before adding the next. Rushing can cause color smudging or blending, potentially impairing the clarity and definition of your design. Patience is required to achieve a crisp and vibrant finish.
5. Detailing:
Switch to smaller brushes for precision as you add details. Take your time with each detail, whether it’s intricate patterns, fine lines, or subtle highlights. Detailing is where your artistic vision comes to life, so take the time to perfect every nuance.
6. Finishing touches:
Consider any finishing touches once your layers and details are in place. To achieve the desired overall effect, certain elements may be refined, highlights added, or color tones adjusted. These finishing touches are the final strokes that bring your glass painting to life.
Curing Methods
Air Drying vs. Baking
1. Air Drying:
Air drying is a common method for curing certain types of glass paints. It involves allowing the painted glass to dry naturally at room temperature over a specified period. The time required for air drying can vary based on the type and brand of paint you’ve chosen.
Advantages:
- Convenient for smaller projects. No special equipment needed.
Considerations:
- Requires patience, as the drying process may take several hours or even days.
- Ensure the painted surface is protected from dust or disturbances during the drying period.
2. Baking:
Baking is a method recommended for specific glass paints. It involves placing the painted glass in an oven and subjecting it to a controlled temperature for a prescribed duration. Baking accelerates the curing process, resulting in a more durable and resilient finish.
Advantages:
- Speeds up the curing process significantly. Enhances adhesion and durability.
Considerations:
- Follow the manufacturer’s recommendations regarding temperature and duration to avoid overbaking.
- Ensure your glass item is oven-safe, and choose a well-ventilated area.
3. Follow Manufacturer’s
Recommendations:
Regardless of the curing method you choose, always follow the specific recommendations provided by the paint manufacturer. Different paints have distinct formulations, and adhering to the prescribed curing process ensures optimal results in terms of adhesion, vibrancy, and longevity.
Tips:
- Check the paint label or packaging for detailed instructions on curing.
- Note any specific temperature requirements for baking.
- Be mindful of any post-curing instructions, such as allowing the painted item to cool gradually after baking.
Common Mistakes to Avoid
Patience and Precision for a Flawless Finish
Glass painting, though a delightful endeavor, is not without its challenges. To ensure a flawless finish, steer clear of these common mistakes that could compromise the integrity of your artwork:
1. Paint Overloading:
Overloading your brush with paint is a common mistake. Too much paint applied at once can result in drips, uneven coverage, and a loss of control over your strokes. For a more controlled and polished finish, use a small amount of paint and build up layers gradually.
2. Speeding Through Layers:
Refrain from rushing through the layers. Each layer is critical in creating depth and complexity in your glass painting. Allow enough drying time between layers to avoid smudging or color blending. Patience at this stage adds to the vibrancy and clarity of your artwork.
3. Ignoring Drying Times:
Drying times should not be overlooked. Follow the recommended drying times for each layer, whether air drying or baking. Neglecting drying times can compromise paint layer adhesion, reducing the longevity of your glass painting.
4. Surface Preparation Ignored:
A successful glass painting project begins with proper surface preparation. Skipping this step may result in poor paint adhesion, which may result in peeling or flaking over time. For a flawless foundation, take the time to clean and prime your glass surface.
5. Selecting the Wrong Brushes:
The wrong brushes can have an effect on the precision and quality of your glass painting. Make sure you have a variety of brushes for different tasks—small brushes for details, larger brushes for broader strokes, and brushes that are appropriate for the paint you’re using.
6. Ignoring Color Coordination:
Take note of color compatibility. Some paints may not mix well, resulting in undesirable effects or even a muddy appearance. Learn about color mixing principles and select a palette that complements your artistic vision.
7. Techniques for Not Testing:
Glass painting opens up a world of possibilities. Test techniques, color combinations, and brushstrokes on a small piece of glass before diving into your main project. This phase of experimentation allows you to fine-tune your approach and avoid making mistakes on your main artwork.
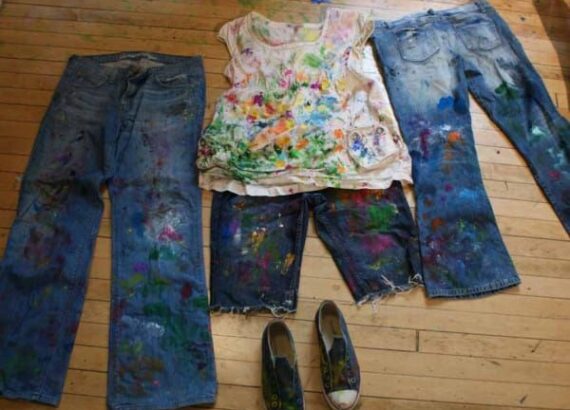
8. Forgetting about safety precautions:
If you’re using baking paints, make sure your workspace is well-ventilated. Follow safety precautions, wear protective gear if necessary, and be mindful of the paint manufacturer’s specific precautions.
Adding Finishing Touches
Completing your glass painting is a milestone, but to ensure its longevity and preserve its beauty, adding the right finishing touches is crucial. Here’s how you can protect and enhance your glass art:
1. Applying a Proper Sealant or Varnish:
Consider applying a suitable sealant or varnish once your glass painting is finished and thoroughly dry. This shielding layer protects your artwork from scratches, dust, and fading over time. It not only brightens the colors but also adds a subtle sheen to the surface.
Tips:
- Select a sealant or varnish designed specifically for glass painting.
- Follow the manufacturer’s application and drying instructions.
- Before applying the sealant, make sure your glass painting is completely dry.
Displaying Your Glass Art
Displaying your glass art is an art in itself. Consider these factors to showcase your masterpiece in the best possible way:
1. Framing Your Glass Painting:
Framing your glass painting serves a dual purpose. It provides protection by creating a barrier against dust and accidental contact, and it also enhances the visual impact of your artwork. Choose a frame that complements the style of your painting and the overall aesthetic you want to achieve.
Considerations:
- Opt for frames that are suitable for glass artwork.
- Ensure the frame complements the color scheme and theme of your painting.
- Consider the thickness of the glass and any additional layers, such as matting.
2. Experiment with Lighting Setups:
Lighting can dramatically influence the way your glass painting is perceived. Experiment with different lighting setups to bring out the colors and details of your artwork. Backlighting, spotlights, or even natural light can create unique effects and highlight the intricacies of your glass painting.
Tips:
- Use LED or soft lighting to avoid excessive heat, especially if your glass painting involves baked or cured paints.
- Position lights strategically to accentuate specific features or create a play of shadows.
- Consider adjustable lighting options to adapt to different times of the day or changing environments.
3. Protective Measures:
If your glass painting is displayed in an area prone to dust or potential contact, consider additional protective measures. A glass or acrylic cover can shield your artwork while allowing it to be viewed without hindrance.
Recommendations:
- Use LED or soft lighting to avoid excessive heat, especially if your glass painting involves baked or cured paints.
- Position lights strategically to accentuate specific features or create a play of shadows.
- Consider adjustable lighting options to adapt to different times of the day or changing environments.
By adding the finishing touches of sealants or varnishes and carefully considering how to display your glass art, you not only protect your masterpiece but also elevate its visual impact. Whether framed on a wall, displayed on a stand, or incorporated into a larger artistic arrangement, your glass painting deserves a setting that showcases its beauty and craftsmanship.
Maintenance Tips of how to paint on glass permanently?
Ensuring the longevity of your glass art requires careful maintenance and preservation. Here are essential tips to keep your masterpiece looking pristine:
1. Gentle Cleaning with a Soft Cloth:
When it comes to cleaning your glass art, opt for a gentle approach. Use a soft, lint-free cloth to remove dust or fingerprints. Gently wipe the surface to avoid scratching or damaging the paint layers. If needed, dampen the cloth slightly with water.
2. Avoid Harsh Chemicals:
Chemicals can compromise the integrity of your glass painting. Avoid using abrasive cleaners, strong solvents, or ammonia-based products. Stick to mild, glass-friendly cleaning solutions to preserve the vibrancy of your colors and the clarity of the glass.
3. Store in a Safe Place:
When not on display, store your glass art in a safe place. Ensure it’s protected from potential knocks, scratches, or exposure to direct sunlight. Consider wrapping it in soft materials or placing it in a padded container to prevent accidental damage during storage.
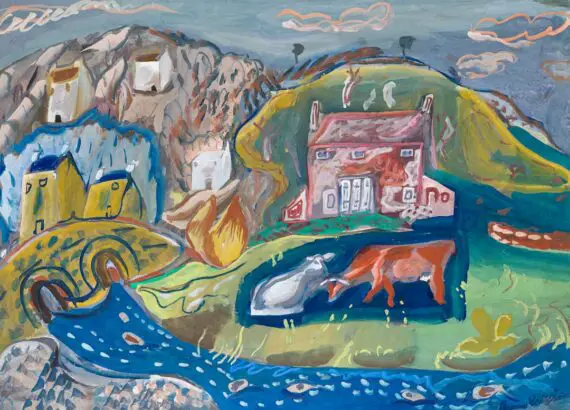
Inspiration and Ideas
Finding inspiration is a perpetual journey for any artist. Here are avenues to explore when seeking ideas for your next glass painting masterpiece:
1. Nature:
Nature is an abundant source of inspiration. From the intricate patterns of leaves to the mesmerizing colors of a sunset, observe the beauty around you. Nature’s diversity offers a limitless array of ideas for your glass painting.
2. Patterns and Textures:
Look for inspiration in patterns and textures in everyday life. Whether it’s the weave of a fabric, the details in architecture, or the randomness of city landscapes, patterns surround us. These elements can spark unique ideas for your glass art.
3. Other Artists’ Works:
Explore the works of other artists, both historical and contemporary. Visit galleries, museums, or online platforms to see a diverse range of glass paintings and gain insights into different techniques and styles. Remember, while inspiration is drawn, always infuse your unique voice into your work.
4. Cultural Influences:
Delve into the rich tapestry of different cultures. Explore traditional art forms, symbolism, and storytelling from various regions. Cultural influences can add depth and meaning to your glass paintings.
5. Personal Experiences:
Your own experiences, emotions, and memories can be powerful sources of inspiration. Reflect on personal journeys, significant moments, or the play of light in your favorite places. Your unique perspective adds authenticity to your artwork.
6. Keep a Sketchbook:
Maintain a sketchbook dedicated to jotting down ideas as they come to you. Sketches, doodles, and notes can serve as a rich reservoir of inspiration when you’re ready to embark on a new glass painting project.
7. Experimentation:
Sometimes, inspiration comes from the act of experimentation. Don’t be afraid to try new techniques, color combinations, or unconventional approaches. The process of exploration can lead to unexpected and captivating results.
Troubleshooting
Even the most seasoned artists encounter challenges. Here’s how to troubleshoot common issues in glass painting:
1. Paint Peeling:
If you notice paint peeling, it may be due to insufficient surface preparation. Lightly sand the affected area to create a better bonding surface. Clean the glass thoroughly before applying a touch-up layer of paint.
2. Uneven Layers:
Uneven layers can result from rushing through the painting process. If the layers are still wet, allow them to dry completely before making corrections. If they’re dry, consider lightly sanding the uneven area and reapplying paint in thin, even coats.
3. Accidental Smudges:
Accidental smudges can be disheartening, but swift action is key. If the paint is still wet, carefully wipe away the smudge with a damp cloth. If it’s dry, consider light sanding before touching up the affected area with fresh paint.
Conclusion
Embarking on the journey of painting on glass permanently is a rewarding experience. With the right materials, techniques, and a dash of creativity, you can turn ordinary glass into extraordinary art. Experiment, learn from mistakes, and watch your skills evolve as you create beautiful, personalized pieces.