How to Shorten Acrylic Nails at Home: A Comprehensive Guide for Nail Enthusiasts
Have you noticed that your acrylic nails are thinning and losing their desired shape? Not to worry! Maintaining your gorgeous manicure doesn’t always require a quick trip to the salon. You can easily shorten your acrylic nails at home and keep them looking fabulous with a little help and some simple tools. How to shorten acrylic nails at home? We’ll take you step-by-step through the procedure in this comprehensive guide in an engaging and educational style, ensuring that you get stunning results without any hassle.
1. Amass Your Materials
Make sure you have all the necessary tools before starting your DIY acrylic nail project. You’ll require a nail clipper, an excellent nail file, a buffer block, cuticle oil, a clean cloth, a bowl of warm, soapy water, and a few other things to make your experience more enjoyable.
2. Set Up Your Work Area
Find a place to work that is cozy and well-lit. To make cleanup simpler and to collect any nail dust, spread out a clean towel or a disposable table cover. You’ll be more successful if your workspace is clean and well-organized.
3. Commence by clipping.
Trim the acrylic nail tips gently with your nail clipper to the desired length. It’s always preferable to start with a little bit longer length than you ultimately want because filing allows you to give the nails even more shape and refinement.
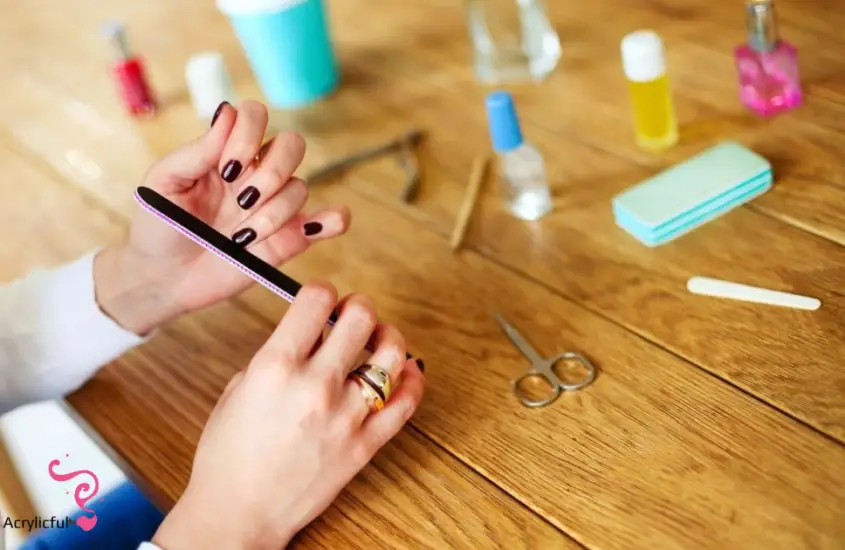
4. Form with accuracy
The fun part is about to begin: shaping your acrylic nails! Start by filing the edges of your nails with a nail file. You have the option to choose between a traditional square, a trendy coffin, an elegant almond, or a fun stiletto shape. To avoid any splitting or damage, file only in one direction. In this situation, patience is essential. Spend some time getting the ideal shape that matches your personal style.
5. Make it Smooth
Change to a buffer block once you are happy with the shape. Buff each nail’s surface gently while moving back and forth. By removing any sharp edges left over from the filing procedure, this step gives your acrylic nails a polished appearance.
6. Drinking Plenty of Water
Your cuticles and nails could use some tender loving care after all that filing and buffing. Each nail should have a few drops of cuticle oil applied to it and massaged in. This encourages healthy growth and keeps your nails hydrated.
7. Shine and Clean
Take a clean cloth and dunk it into the previously prepared warm, soapy water. Remove any dust or residue left over from filing and buffing with a soft cloth. Your nails will be clean and prepared for the finishing touches after this step. Your nails should already appear much more attractive and polished once they have dried.
8. Be awed by the outcomes
Back up and take in your own workmanship! Your acrylic nails ought to be perfectly shaped, silky, and show-ready by this point. You can proudly display your beautiful nails whether you’re going to a special event or just want to relax at home and enjoy your manicure.
9. Maintenance Tips
Consider the following simple maintenance tips to extend the life of your shortened acrylic nails:
1. Regularly moisturize:
To avoid drying out and cracking, keep your hands and nails hydrated. For the best results, use hand cream and cuticle oil on a daily basis.
2. Avoid Harsh Chemicals:
Wear gloves when doing household chores or using cleaning products to protect your nails from harsh chemicals.
3. Be Gentle:
While acrylic nails are strong, they can break if used incorrectly. Be mindful of your actions to avoid causing harm.
4. Fills on a regular basis:
As your natural nails grow, a gap will form between your cuticle and the acrylic nail. To maintain the seamless look, schedule regular fills at the salon or consider learning to do them at home.
10. Have Fun and Experiment
Shortening your acrylic nails at home saves you time and money while also allowing you to experiment with different shapes and styles. Have fun with your nails and express yourself creatively. To express your distinct personality, experiment with new colors, patterns, and even nail art.
Conclusion
Finally, learning how to shorten acrylic nails at home is both exciting and empowering. You can achieve stunning results while maintaining the integrity of your acrylic manicure with the right tools, a little patience, and some creativity. For the best results, gather your supplies, shape with precision, smooth it out, and always keep your nails hydrated. Enjoy the process, and get ready to show off your beautiful, freshly manicured acrylic nails!
How to shorten acrylic nails at home (FAQs)
Q1: How often should I trim my acrylic nails at home?
Answer: The frequency of trimming your acrylic nails depends on how quickly your natural nails grow. On average, you might need to trim and shape your acrylic nails every two to three weeks to maintain their appearance.
Q2: Can I use regular nail clippers on acrylic nails?
Answer: Yes, you can use regular nail clippers to trim the length of your acrylic nails. However, it’s essential to be gentle and avoid applying excessive force to prevent cracking or damaging the acrylic.
Q3: What’s the best way to prevent acrylic nails from lifting?
Answer: To prevent acrylic nails from lifting, ensure your natural nails are clean and dry before applying acrylics. Also, be cautious with exposure to water and harsh chemicals, as they can weaken the bond between the acrylic and your natural nail.
Q4: Are there any special care tips for different acrylic nail shapes?
Answer: Yes, the care for different nail shapes may vary slightly. For stiletto or almond shapes, be mindful of the pointed tips, as they can be more prone to breaking. Square and coffin shapes provide more durability but should still be treated with care to avoid chipping or lifting.
Q5: How can I fix a broken acrylic nail at home?
Answer: If you experience a broken acrylic nail, you can temporarily repair it using nail glue and a nail repair patch. However, it’s advisable to consult a professional for a more permanent fix to maintain the integrity of your nails.
Q6: Can I remove acrylic nails at home?
Answer: While it’s possible to remove acrylic nails at home, it’s best done by a professional to minimize damage to your natural nails. If you choose to remove them yourself, follow a gentle and cautious process to avoid harming your nails.
Q7: What should I do if my acrylic nails start to discolor?
Answer: Discoloration can occur due to various factors, such as exposure to chemicals or UV light. To prevent and address discoloration, wear protective gloves during activities that involve chemicals, and consult with a nail technician for advice on color restoration.
Q8: Can I apply nail polish or nail art on acrylic nails?
Answer: Absolutely! Acrylic nails provide an excellent canvas for nail polish and nail art. You can experiment with various colors, designs, and even nail stickers to express your creativity and style.
Q9: Are there any special considerations for long-term acrylic nail wear?
Answer: Long-term acrylic nail wear requires regular maintenance, including fills and proper care. It’s also essential to give your natural nails some breathing time between acrylic applications to keep them healthy.
Q10: What should I do if my acrylic nails start to lift or become uneven?
Answer: If you notice your acrylic nails lifting or becoming uneven, it’s best to consult a professional nail technician. They can assess the situation and provide the necessary repairs or adjustments to ensure your nails look their best.